
I'm Listed Here


Monday, May 10, 2010
1 month Anniversary
 4:01 PM
On Wednesday, I am celebrating my 1 month anniversary with my new look/design at the Pink Cricut website--with a stamp giveaway! I have already told you about it on the Facebook Fan page--so, don't forget to ENTER.
You can enter by, becoming a Follower on here--(look down and to the right)--and then telling me you did so on the Facebook Fan Page!
Good Luck to all of you!!

You can enter by, becoming a Follower on here--(look down and to the right)--and then telling me you did so on the Facebook Fan Page!
Good Luck to all of you!!

Saturday, May 8, 2010
Embossing with Ink, a variation on Letterpressing
1:46 PM
As I drooled over the LetterPress by Epic 6, I thought that maybe I could do something similar with the tools I already owned.
Since, this experiment though, I was given the LetterPress by a couple of very good friends, for my birthday! So, there will be some videos in the future with the official LetterPress. :) (SO EXCITED)

 Inked the background
 Inked the image itself
Since, this experiment though, I was given the LetterPress by a couple of very good friends, for my birthday! So, there will be some videos in the future with the official LetterPress. :) (SO EXCITED)

Big shot or Cuttlebug
Embossing Folders
Ink
 Inked the background
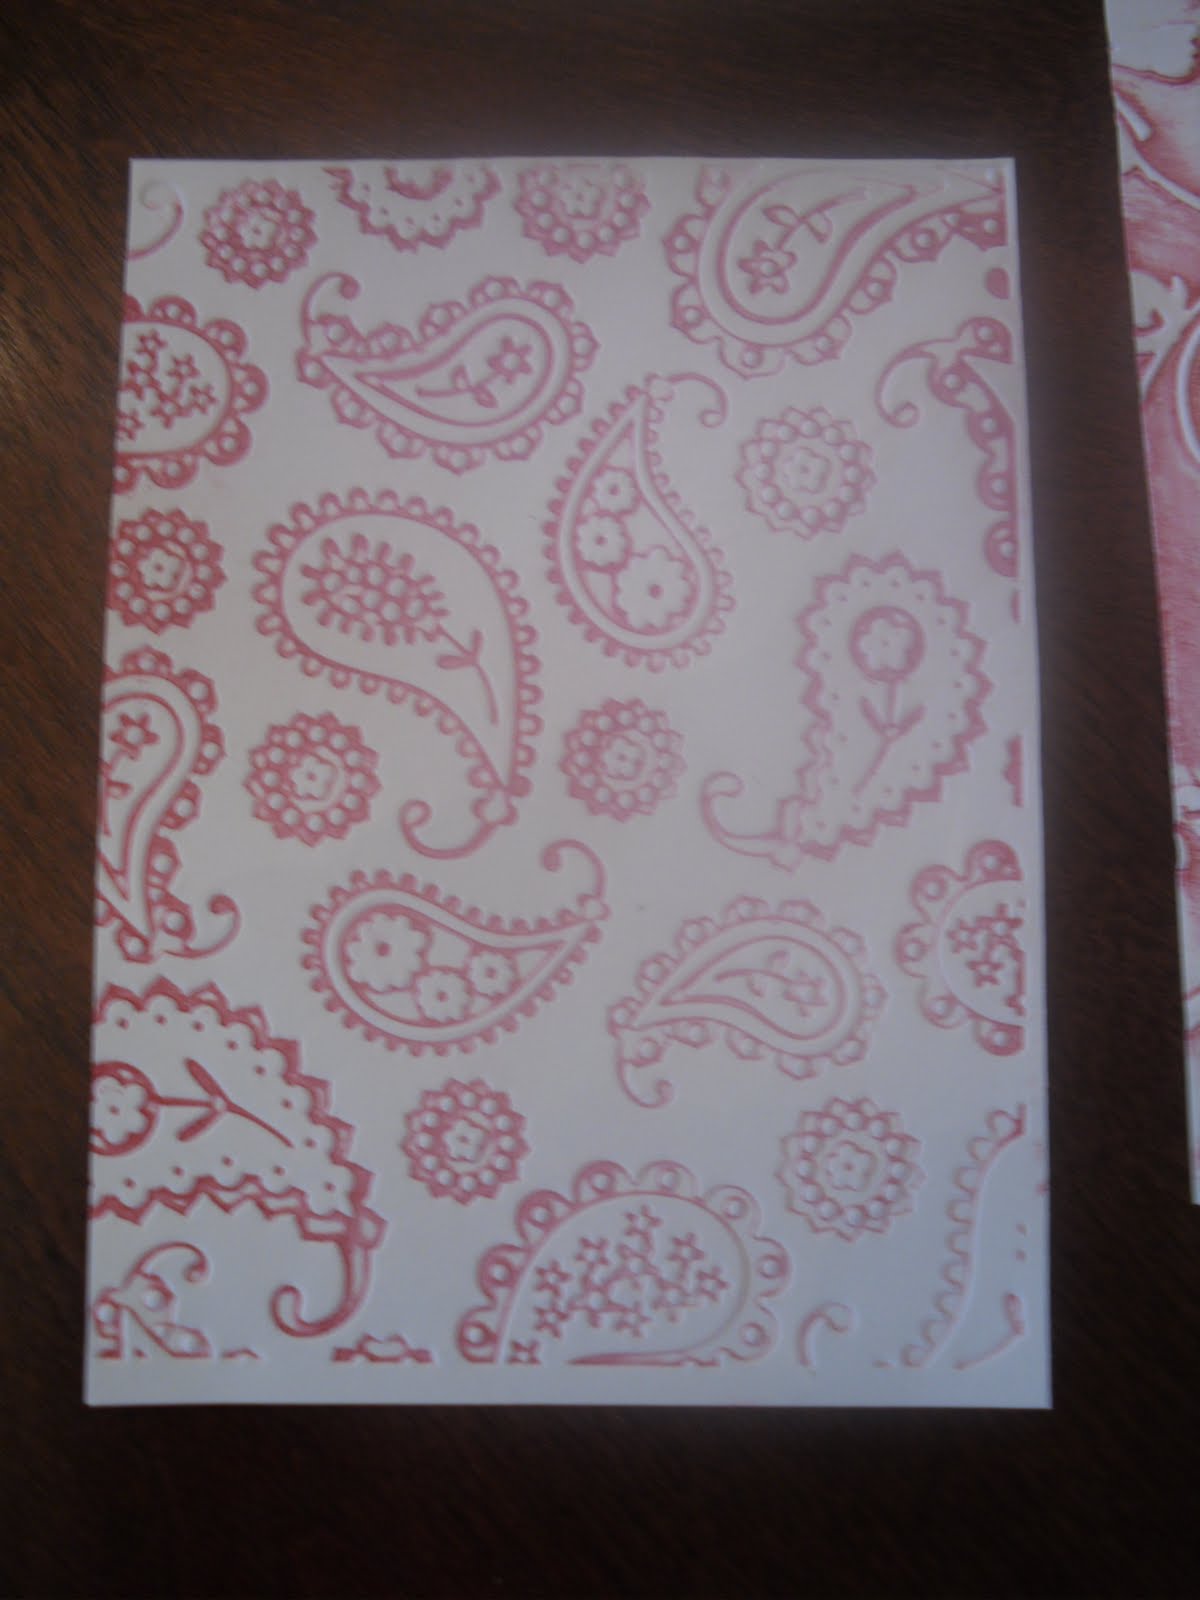 Inked the image itself
Tuesday, May 4, 2010
Robot Card
11:05 AM

Since I am having camera trouble today, but still wanted to share--I will do this the "wordy" way.
The other day, during Michael's Scrapbook sale, I picked up these ADORABLE robot stamps. I am not normally into robots, but I fell in love with these little guys--and at $6, who wouldn't be in love?
During the metal challenge, I decided to use my cute little robots--it seemed appropriate.
For this project, you will need:
White premade card and envelope
Robot stamp
Yellow Carstock
Purple Cardstock
Metal brads
Microtip scissors
Metallic Paper
Fold card using bone folder, and cut yellow paper 1 inch less than the measurement of the card. So, if your card measures 5x7, cut the yellow mat to be 4x6.
Cut a border of purple cardstock the same height, but 2.5 inches wide. Glue both of these down on the card base, as shown starting with the yellow.
Stamp Mr. Robot on white cardstock, with purple and yellow ink. I used ColorBox Fluid Chalk in order to ink the stamp in different colors. (I just recently started using these, in addition to my other ink--and I love them! They dry quickly, and give a softer look. Plus, I love that I can ink a small stamp in more than one color using the corners of the "cat's eye")
Once, the image is stamped, cut out using microtip scissors. Glue to purple cardstock, and cut out the shape once again.
Pop-dot the robot to metallic paper, and glue the metallic paper to the bottom right hand corner. Use purple stickles, to accent the robot's mouth and "buttons"
Stamp a sentiment, on white cardstock and glue to purple cardstock. Pop-dot and place in between the purple and yellow cardstock in the middle. (The robot stamps I bought, came with a couple of sentiments)
Punch out 3 holes, using the Big Bite, to place 3 metal brads in top right corner. (If you don't have one of these, use a paper piercer. Keep on the lookout though, I have seen these as cheap as $10 at a local Walmart!)
Line the inside of the card, if you desire, and then you have a card fit for any robot-fan!
Vinyl Art
10:46 AM

One of my favorite things to do with my cricut, is to use it to cut out vinyl decorations for my home. In the first few weeks, I think my husband was convinced I was going to cover every inch of our house in vinyl lettering.
My favorite piece I did, is in my scraproom. I bought the Love Struck Limited Edition cartridge specifically for it's zebra heart. I am sure I will use it on other things as well, but it is the shape that "sold" me. I was also excited to be able to get it at a very reasonable price. You can get them for under $20 right now at www.scrapbookpal.com.
For this heart you will need:
2 colors of vinyl. I used fuschia and black.
Cricut Expression
12 inch cutting mat
Love Struck Cartridge
Scissors
Transfer tape
Cricut spatula
First cut the shadow of the zebra heart, in black vinyl at 12 inches. Since the shape was so big, I did not need the transfer tape.
Peel and place the heart on desired surface. Since, I was using it on a double door, I cut the heart in half before peeling the backing off.
Next, cut the zebra printed heart, at 11.5. With the extra space, and not wanting to waste any pink vinyl, I also cut out the word, "pink" along with some swirls.
Once cut, use the transfer tape to "pick up" the design. Some of the zebra stripes are a little intricate, and it's hard to tell which ones are supposed to stay, and which ones aren't. The transfer tape allows you to slowly peel up the design, as you distinguish between the stripes.
Line the zebra striped heart over the black heart, and press firmly. Use a transfer tool of some sort, to rub out the bubbles and get the vinyl to detach from the transfer tape. I used a kitchen spatula :).
Repeat with any extra shapes you may have cut out with the "extra" vinyl.
Sunday, May 2, 2010
The Winner of the Heavy Metal Challenge!
10:49 PM
The Winner of the Heavy Metal Challenge is Kathryn Rodriguez! She showed off her talent with impressive embossing, inking and design! I heart this card!
Kathy has been scrapbooking for years, and knows her way around any scrapbooking tool! She is always willing to share her expertise or her paper :).

Thanks for the entry Kathy! Good Luck to the rest of you, on the next challenge!
Kathy has been scrapbooking for years, and knows her way around any scrapbooking tool! She is always willing to share her expertise or her paper :).

Thanks for the entry Kathy! Good Luck to the rest of you, on the next challenge!
Subscribe to:
Posts (Atom)

Grab my Button!
Subscribe To


 Posts
All Comments
Posts
All Comments
Share with your Friends
